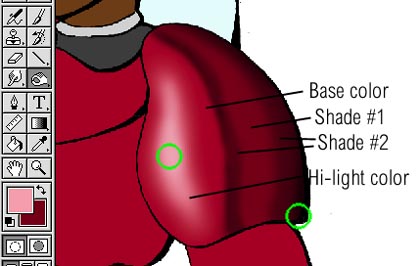
After adding the hi-light color, use the Dodge tool to give it more shine. I've also used the Burn tool to help accentuate the shadows and increase the reflective surface. Now, doesn't that look pretty sharp? Doing the rest of the armor is pretty straightfoward.
Here is the finished armor. It's important to not only be careful with your color selections but also the contours you choose to do the shading. Now that the armor's finished, what about the rest of the coloring?
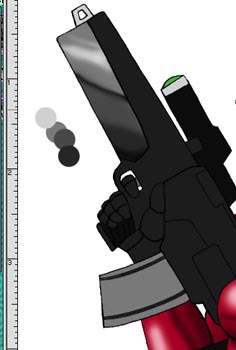
Now we've added some more traditional silver chrome on her rifle. Note that the method and color choices remain the same, except it's shades of gray instead of red. So long as you pick shades with enough contrast, you can use this method with any color you like. There are times, though, when it's better to create a metallic gradient as opposed to doing the coloring freehand. Go to the next page and let's get to it!